The secret to vegetable crisps that actually stay crisp is simple enough once you know what you are aiming for. You need to drive off enough water, keep the slices evenly thin, avoid trapping steam, and let them cool properly before you judge the texture. Most limp batches fail at one of those points rather than because the recipe itself is wrong.
Good homemade vegetable crisps are less about fancy ingredients and more about control. A beetroot slice that is slightly too thick, a tray that is slightly too crowded, or a warm batch tipped straight into a container can undo all your effort. Once you get the slicing, drying and cooling right, the difference is obvious, both in the snap and in how long they stay that way.
What makes vegetable crisps go crisp instead of limp?
Crisp texture comes from water leaving the vegetable. Fresh vegetables are full of moisture, and that moisture has to be reduced enough for the structure to dry out and turn brittle. If too much water stays in the slice, you get bendy, leathery or chewy results instead of a clean snap.
Thickness matters because it controls how easily water can escape. Very thin slices dry more quickly and evenly, which is why a mandoline is so useful. If one slice is paper thin and the next is twice as thick, they will not finish together. The thin one may burn while the thicker one is still soft in the middle.
Oil plays a supporting role rather than doing all the work. A light coating helps heat move across the surface and encourages browning, especially when baking or air frying. Too much oil, though, can leave the surface greasy and slightly heavy rather than crisp. With deep frying, the oil temperature matters more than the amount on the slice. If the oil is too cool, the vegetable absorbs more oil before it has a chance to crisp.
Cooling is the part many people rush, and it is one of the biggest reasons a batch seems disappointing. Vegetable crisps often firm up as steam escapes and the structure settles. If you stack them hot, or slide them into a bowl while they are still giving off heat, that trapped steam softens the whole lot. Spread them out on a wire rack or a tray lined loosely with kitchen paper and let them cool completely before storing.
Salt can also affect texture. Fine salt added too early can draw moisture to the surface, especially on watery vegetables. For many batches, it is better to season lightly after cooking, once the slices are crisp and no longer steaming.
Which vegetables work best for homemade crisps?
The most reliable vegetables for homemade crisps tend to be those with enough structure to hold a slice and not so much water that they collapse into floppy discs. Potatoes are the obvious benchmark, but plenty of other vegetables work well too.
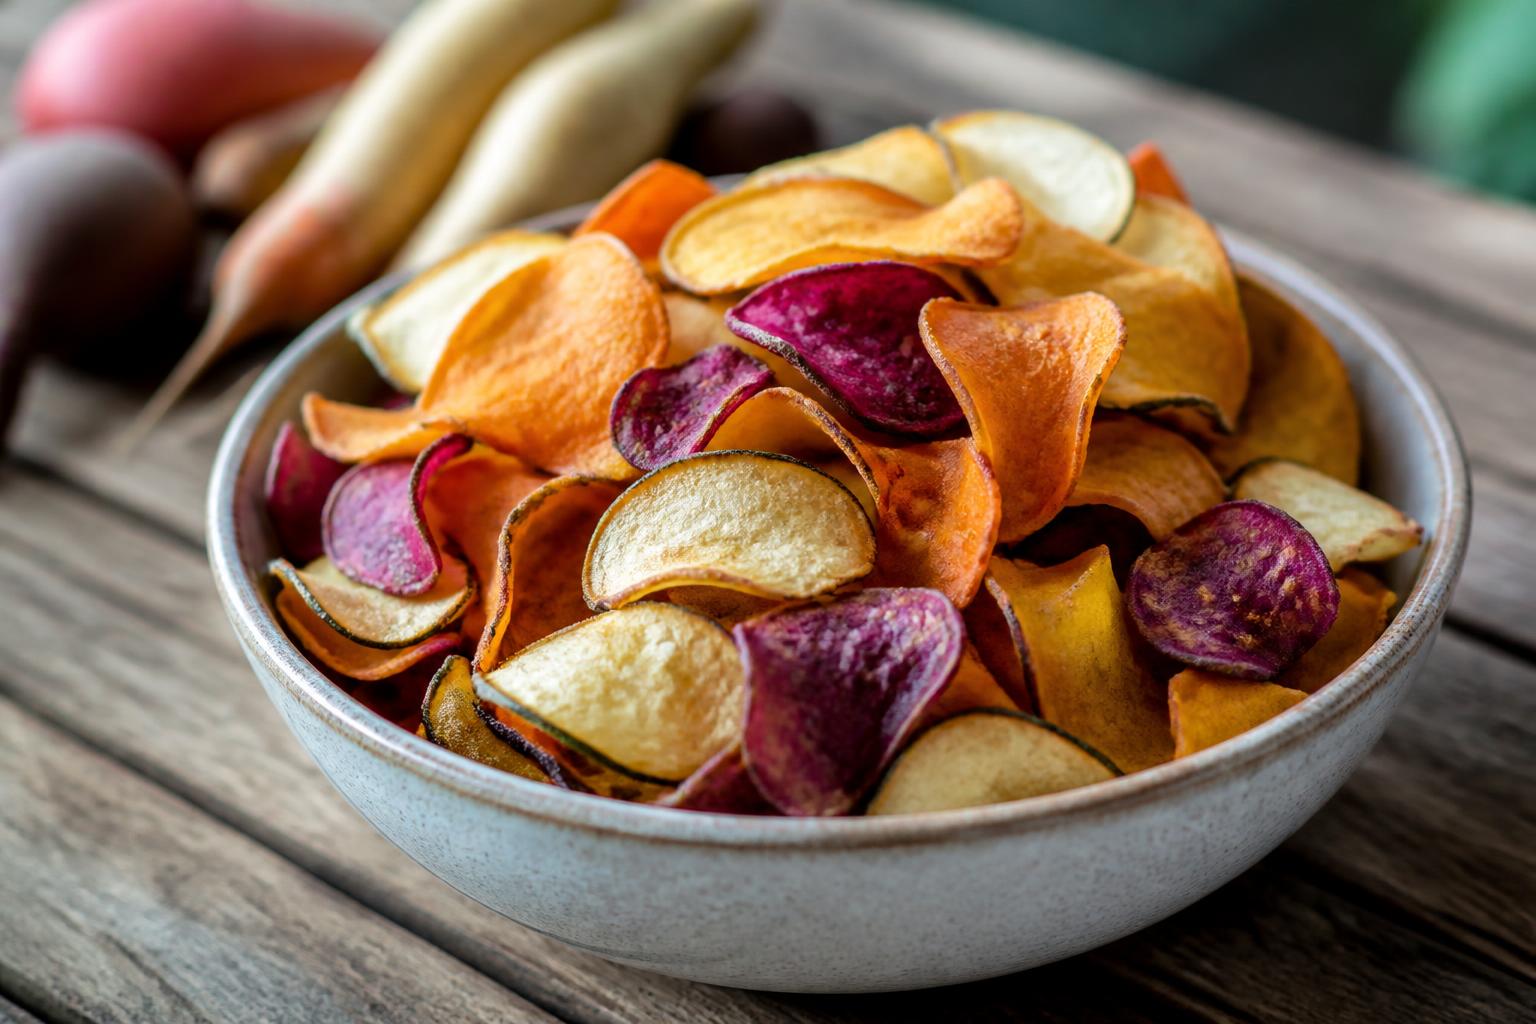
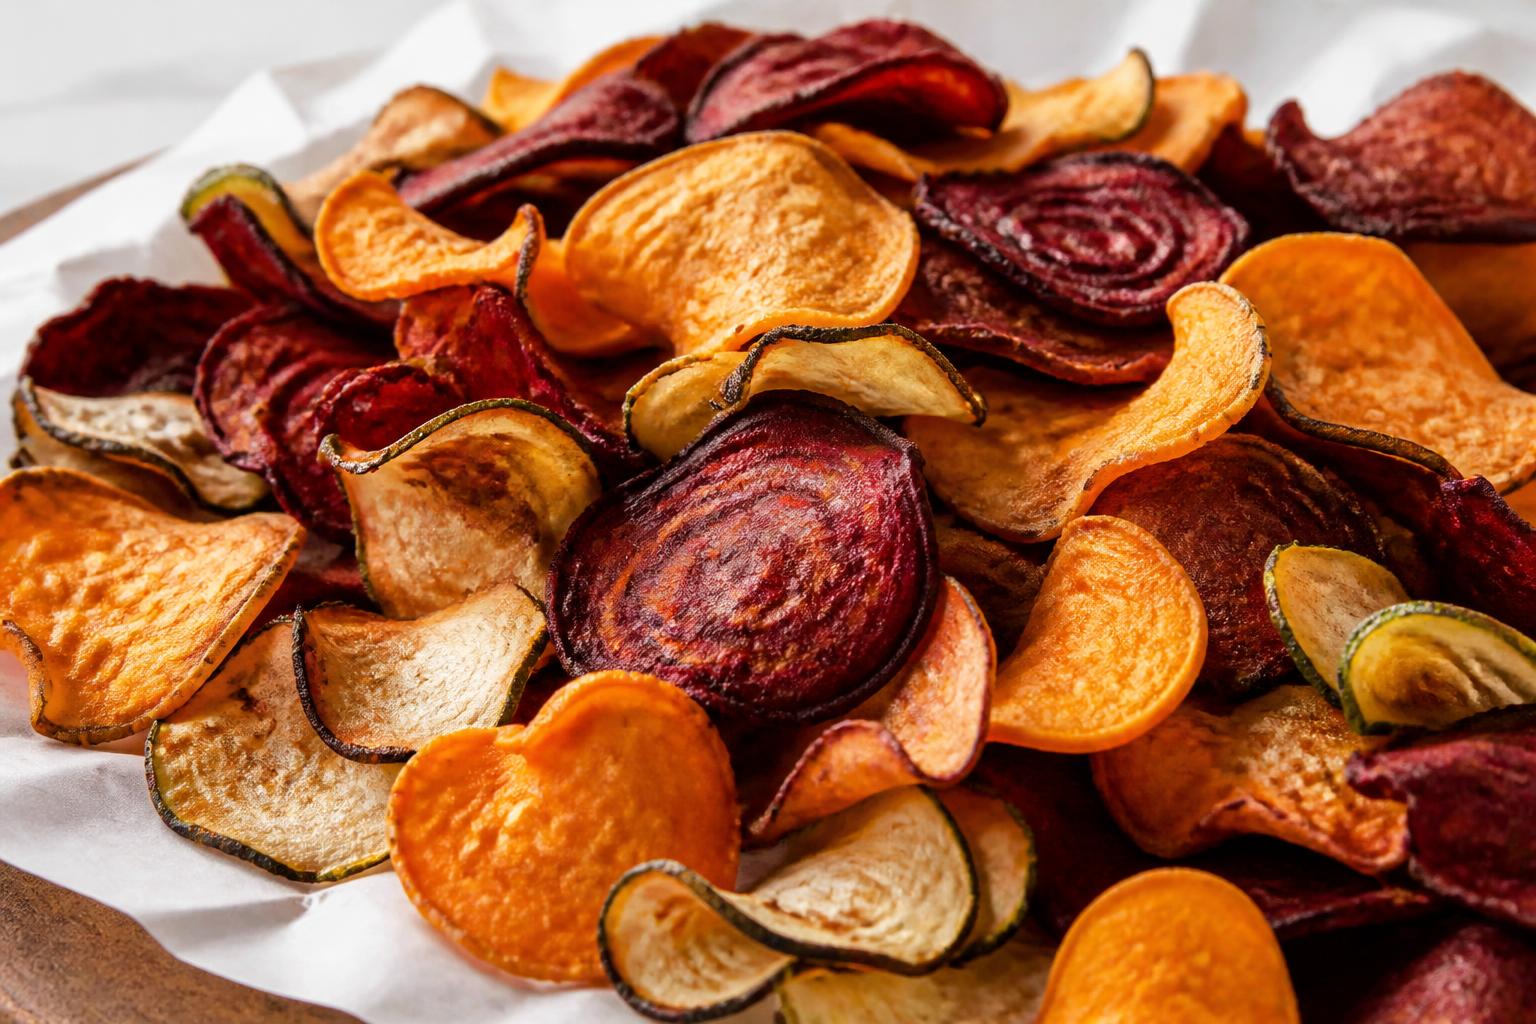
Sweet potatoes are popular because they slice neatly and crisp up nicely, though they can catch quickly because of their natural sugars. Parsnips are excellent, with a dry, earthy sweetness and a texture that goes properly crisp if sliced thinly. Beetroot gives beautiful colour and a satisfying crunch, but it needs a watchful eye because sugar content can push it from caramelised to burnt quite fast.
Carrots can work well, especially in very thin slices, but they have less starch and can turn firmer and chewier than people expect. Celeriac is a strong choice if you want a more savoury, almost nutty flavour. It has enough body to make a proper crisp and usually behaves well in the oven or fryer. Courgettes are trickier because of their high water content. They can dry into chips, but they are less likely to give that classic crisp snap unless handled very carefully.
Starch, water and sugar all shape the outcome. Starch helps create a more familiar crisp texture. Water is the main obstacle, because more moisture means more drying time and more opportunity for uneven cooking. Sugar encourages browning, which can be lovely, but it also makes vegetables more likely to darken before they are fully crisp.
That is why root vegetables are usually the easiest place to start. They are denser, they slice cleanly, and they generally reward a bit more forgivingly than watery vegetables. If you are trying a mixed batch, remember that different vegetables cook at different speeds. Beetroot, parsnip and sweet potato on one tray may look pretty, but they rarely finish at exactly the same moment.
If you are also weighing up how these compare with shop-bought options, our guide to whether vegetable crisps are a healthy swap for potato crisps looks at the everyday trade-offs without pretending all crisps are suddenly salad.
How should you slice and prep them?
Start by washing the vegetables well. Root vegetables often carry grit in the creases, and that is the last texture surprise anyone wants. Peel if the skin is thick, rough or likely to toughen in cooking. Beetroot, parsnips, sweet potatoes and celeriac are often better peeled for a more even result, while potatoes and carrots can go either way.
The main job is slicing evenly. Aim for about 1mm to 2mm thick for most vegetables. Thinner slices crisp more easily. Thicker ones can still work, but they need longer and are more likely to bend. A mandoline gives the most consistent results, though a very sharp knife and a steady hand can do the job if you are patient. If you use a mandoline, use the guard. This is not the day to donate a fingertip to the snack bowl.
Once sliced, deal with surface moisture. Pat the slices dry thoroughly with a clean tea towel or kitchen paper. For watery vegetables, this step matters a lot. For potatoes, sweet potatoes and some roots, a short soak can help in specific cases. Plain potato slices benefit from a rinse or brief soak to remove excess surface starch, then a very thorough dry before cooking. That can help prevent sticking and encourage a cleaner crisp. With beetroot or parsnips, soaking is usually less useful than simply drying well.
Do not oil the tray and the vegetables heavily. Toss the slices in a bowl with just enough oil to coat lightly. A teaspoon or two can go a long way for a single tray. The slices should look faintly glossy, not drenched.
Seasoning is best kept simple at first. Fine sea salt, black pepper, smoked paprika, garlic powder or a pinch of rosemary can all work well. Avoid wet marinades and anything sugary before cooking. Honey, maple syrup and sticky spice pastes almost always lead to scorching before the crisp texture develops. If using powdered seasonings, apply them lightly so they do not clump and create damp spots.
Finally, give the slices space. Whether you are baking, air frying or frying, crowding is the enemy. Overlapping traps steam and causes patchy cooking. One flat layer is the goal.
Is baking, air frying or deep frying best?
Each method can produce excellent homemade vegetable crisps, but they do different jobs and each has its own usual mistakes.
Baking is the easiest for larger batches and the least hands-on once the trays are in. It works particularly well for root vegetables. Use a hot oven, usually around 160C to 180C fan depending on the vegetable and thickness. Lower temperatures help with sugary vegetables like beetroot or sweet potato, which can darken too fast. Turn the slices partway through if needed, and remove the ones that are ready while the rest carry on. The common mistakes are overcrowding the tray, using too much oil, and assuming all slices will finish together.
Air frying is excellent for small batches and quick results. The circulating heat can crisp the edges beautifully, but the basket size limits how much you can cook at once. It works best when the slices are arranged in a fairly open layer. If the basket is packed, the vegetable steams instead of crisping. Shake or turn partway through, and expect to work in batches. Air frying can be especially handy if you want a quick evening snack without heating the whole oven.
Deep frying gives the most classic crisp texture and the fastest cooking, but it also demands more attention. Use a neutral oil with a high smoke point and keep the temperature steady, often around 160C to 180C depending on the vegetable. Too cool, and the slices absorb oil and turn limp. Too hot, and the outside colours before the inside has dried enough. Fry in small batches so the oil temperature does not drop sharply. Lift the crisps out as soon as they are coloured and crisping at the edges, then drain well.
For many home cooks, baking is the best balance of ease and consistency. Air frying is brilliant for convenience. Deep frying gives the most dramatic crunch, but it is the least forgiving if you are distracted. None of them can rescue poor prep, though. Uneven slices and damp surfaces will cause trouble whichever method you choose.
If crisp texture is your thing beyond vegetables, our piece on how to roast spiced chickpeas that stay crisp longer uses the same basic logic of moisture control and proper cooling.
Why do some batches burn, bend or turn chewy?
Burning usually comes down to one of three things. The oven or oil is too hot, the slices are too thin, or the vegetable is naturally high in sugar. Beetroot, parsnip and sweet potato all brown quickly. The fix is to reduce the heat slightly, check earlier, and pull ready slices out in stages rather than waiting for the whole tray.
Bending often means the slice has dried unevenly. One side may have coloured while the middle still holds moisture. It can also happen when slices are a bit too thick. Try slicing thinner, turning halfway through baking, and making sure the slices are laid flat from the start. A bent crisp is often not far off being done, but it may need a few more minutes and better airflow.
Chewiness usually points to trapped moisture. The slices may not have cooked long enough, or they may have been crowded so the water had nowhere to go. It can also happen after cooking if the crisps were piled up while hot. If a batch cools chewy, you can often rescue it with a short return to the oven or air fryer, then another proper cool on a rack.
Patchy colour is usually an issue of uneven slicing or uneven oiling. If some slices are pale and others dark, your heat may be fine but your prep is not consistent enough. A mandoline makes a huge difference here.
Greasiness is mainly a frying problem, though it can happen with over-oiled baked crisps too. In deep frying, greasy crisps usually mean the oil was not hot enough, or too many slices went in at once. In the oven, it means the slices were coated too heavily and effectively shallow-cooked in patches rather than dried and crisped.
A final common problem is expecting every vegetable to behave like a potato crisp. Some vegetables naturally produce a lighter, more delicate crunch. Others end up a little more rustic. Crisp is still possible, but the exact texture varies. That is not failure, it is just the ingredient showing its own character.
How do you cool, store and serve them well?
The finishing stage decides whether your hard work lasts beyond the first handful. As soon as the crisps are done, transfer them to a wire rack if you have one. This lets air circulate and steam escape from all sides. If you do not have a rack, spread them in a single layer on kitchen paper or baking paper. Do not stack them in a bowl straight away.
Season while they are still warm enough for the seasoning to cling, but not so hot that they are still actively steaming. A light sprinkle of fine salt, a dusting of paprika, or a little vinegar powder can work well. Add stronger seasonings gradually. It is very easy to overdo them on a delicate crisp.
Let the crisps cool completely before storing. This is non-negotiable if you want them to stay crisp. Any residual warmth inside a container creates condensation, and condensation is the fast track to disappointment.
Store them in an airtight container at room temperature. A metal tin or well-sealed food box works better than a loosely folded paper bag. If your kitchen runs humid, they will soften faster, especially in damp British weather. In that case, making smaller batches more often is usually better than trying to hold a giant stash for days. A small food-safe paper towel in the container can help catch a bit of excess surface moisture, though it is not a miracle fix for under-dried crisps.
If they do soften, you can often revive them. Five minutes in a moderate oven or a few minutes in the air fryer usually brings them back, provided they were properly cooked in the first place.
For serving, treat them as more than a side note. They are great on their own, but they also work well with hummus, whipped feta, tzatziki or a simple yoghurt dip. A handful over soup adds crunch. A few scattered over a lunch salad do the same job as croutons, but with more colour and a lighter feel. They also fit neatly into the wider world of healthy savoury snacks for everyday choices, especially when you want something crisp without opening another standard bag from the cupboard.
The best part is that once you understand the method, you can adapt it to whatever is in the veg drawer. Homemade vegetable crisps are not difficult, but they do reward attention. Slice thinly, dry thoroughly, cook with space, and cool with patience. That is what turns a tray of vegetables into something properly crisp, and keeps it that way long enough to enjoy.

Questions about this article or a correction to suggest? Get in touch. Read more about our editorial approach.